Optimizing the sales cycles is important to maximize the revenue of your company. And Freshsales lets you build efficient systems to increase revenue growth.
Email marketing can be one of the major sources of revenue for online businesses, and AMP emails are changing the game of email marketing due to their high conversion rates.
We, at Mailmodo, have built the best AMP ESP out there, and if you want to give it a ride. But there is nothing to worry about if you already have your systems locked in Freshsales.
This guide will discuss how you can easily connect the Freshsales integration with Mailmodo and create seamless triggered email campaigns.
Table of contents
- Benefits of using Freshsales integration with Mailmodo
- How to send AMP emails from Freshsales using Mailmodo
- Wrap up
Benefits of using Freshsales integration with Mailmodo
Here are some benefits of integrating your Freshsales account with Mailmodo to send AMP emails:
Mailmodo also has a catalog of beautiful templates you can choose from and quickly set up your campaign.
If you want to build your template from scratch, you can do that without hiring programmers.
We keep coming up with exciting components like spin the wheel that you can add to your emails and leave a lasting impression on your customers.
We kept only a few steps so you could get up and running quickly.
How to send AMP emails from Freshsales using Mailmodo
Follow these steps to set up a triggered AMP email campaign with Freshsales integration:
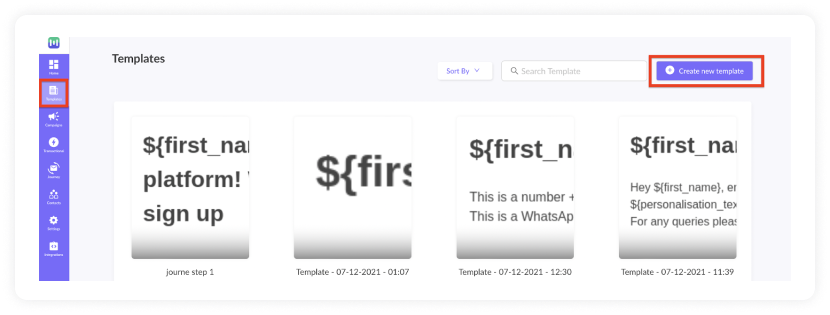
- Go to templates from the vertical menu on the left side. Click on create new template.
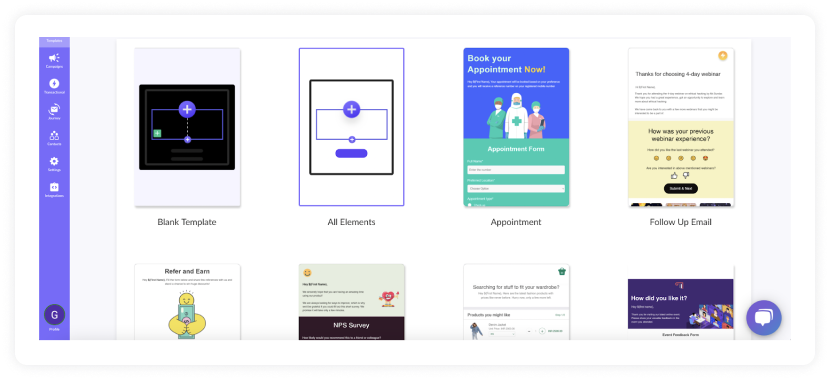
Either select a blank template or a pre-made template.
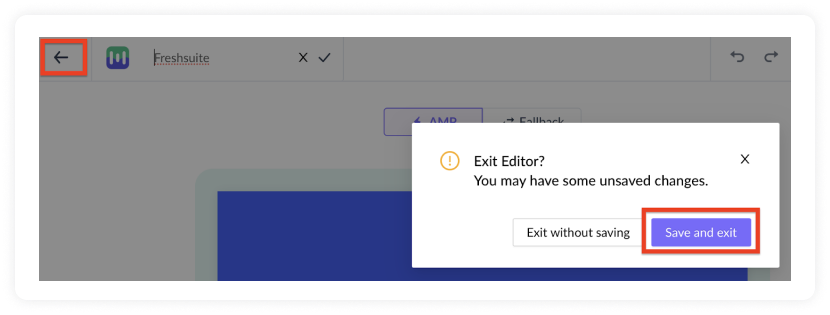
Use the editor to edit the template. Save and rename the template upon completion. After saving, click on the back arrow.

Click on save and exit.
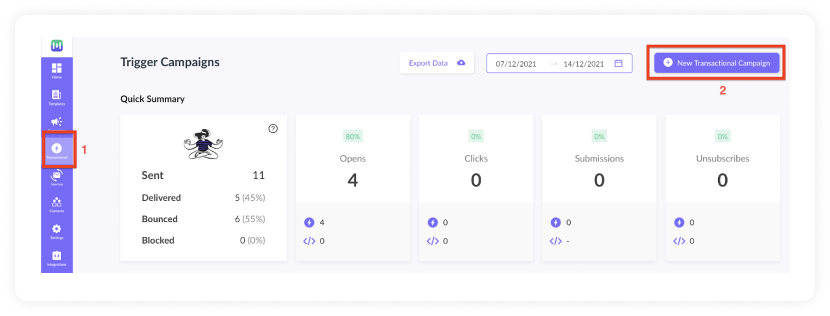
You will be redirected to the home page. Click on transactional from the vertical menu on the left. Next, click on New Transactional Campaign.
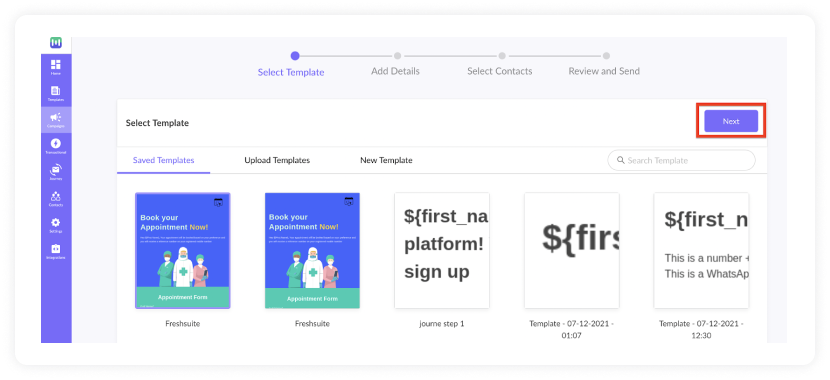
- Select the template you saved before. Click on next.
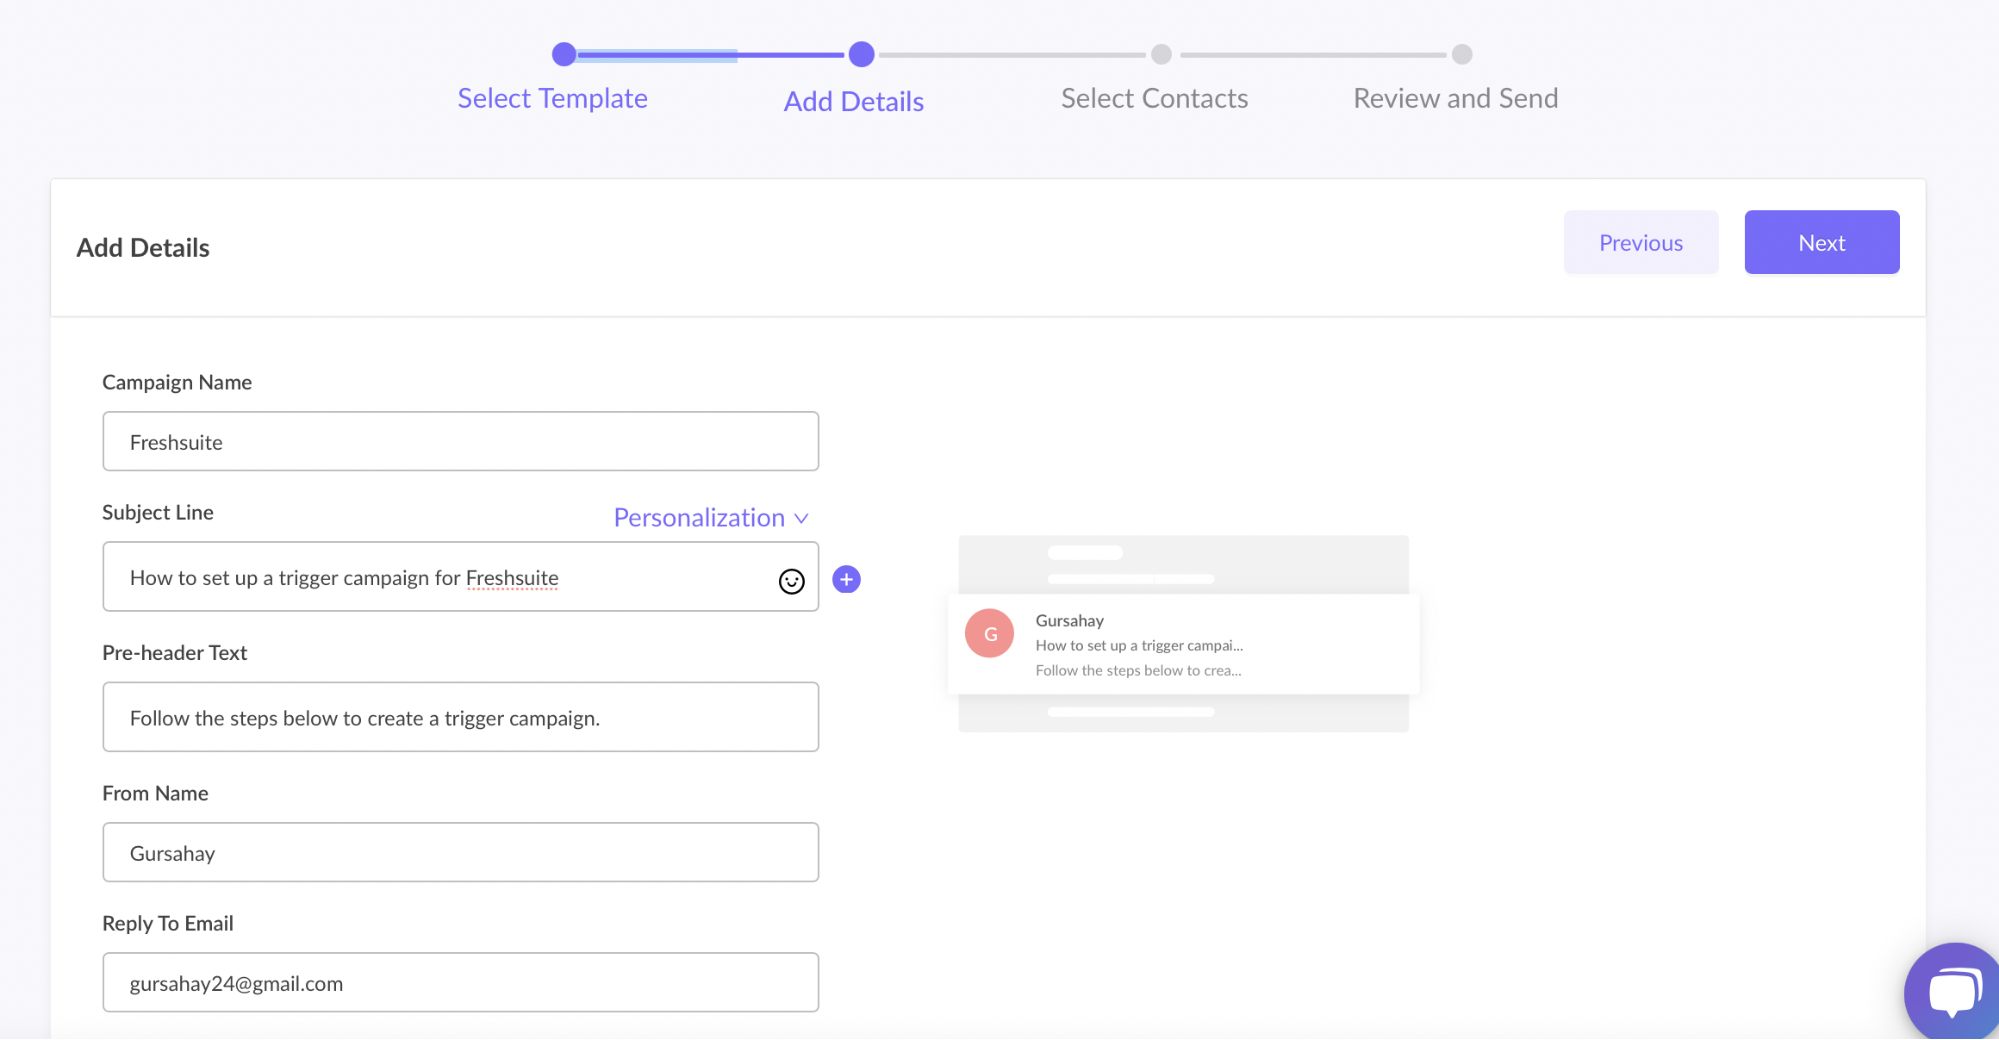
- Add Subject Line, Pre-header text, From name, and Reply to email. Click on next.
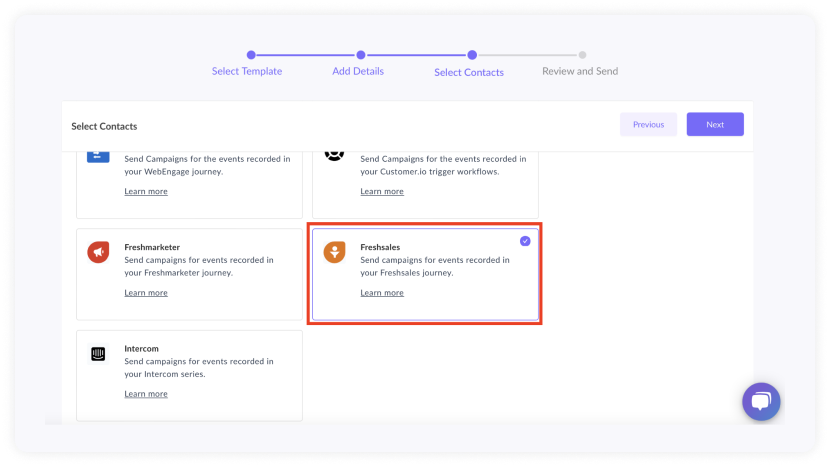
- You will be redirected to trigger on events. Select Freshsales from the list of platforms. Click on next.
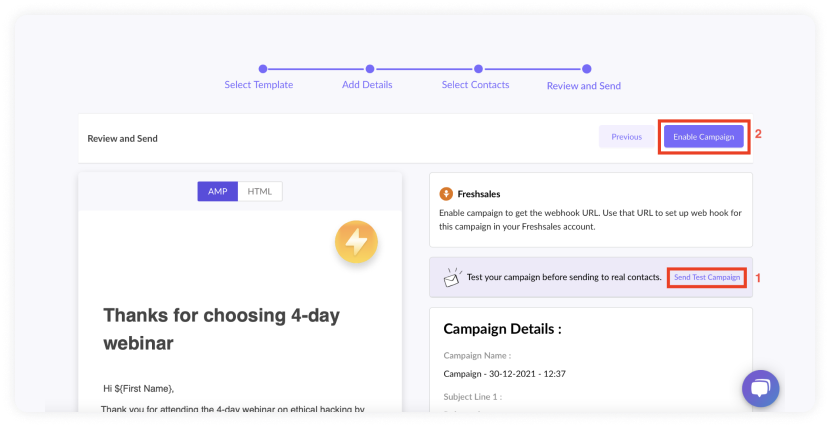
- Review and test your campaign. To test, click on send test campaign->enter email ID->send test email.
Once tested and reviewed, click on enable campaign.
- You will be redirected to Trigger Info section. Click on the Copy URL button. We will use this webhook URL in the Freshsales workflow.
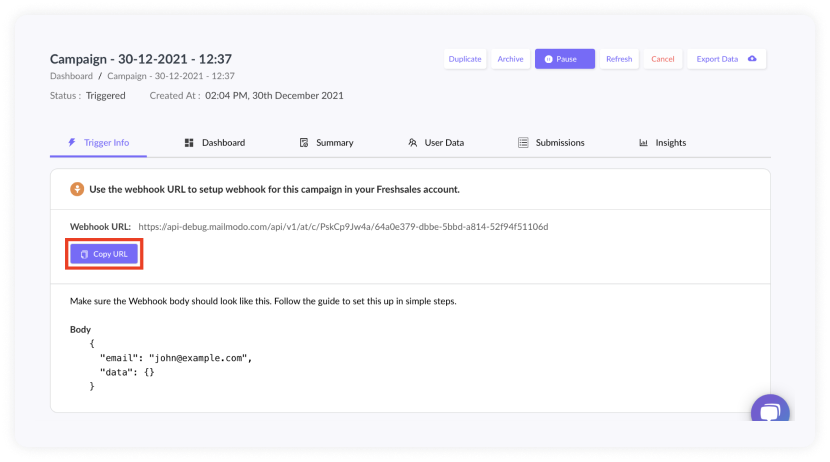
To access this page in the future, go to transactional in the vertical menu (left side)->select the campaign->trigger info.
Freshsales Setup
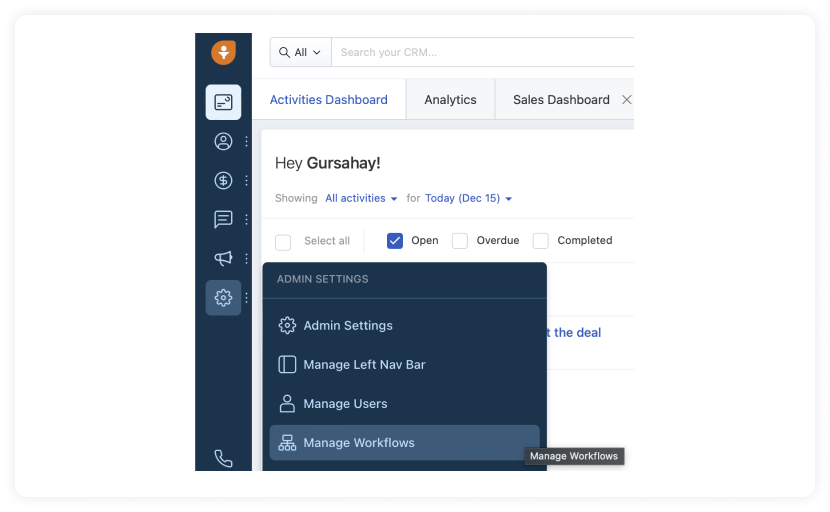
Go to admin settings->manage workflows.
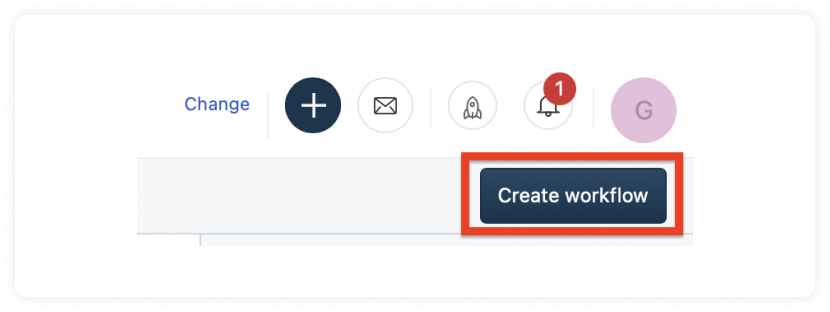
Click on create workflow.
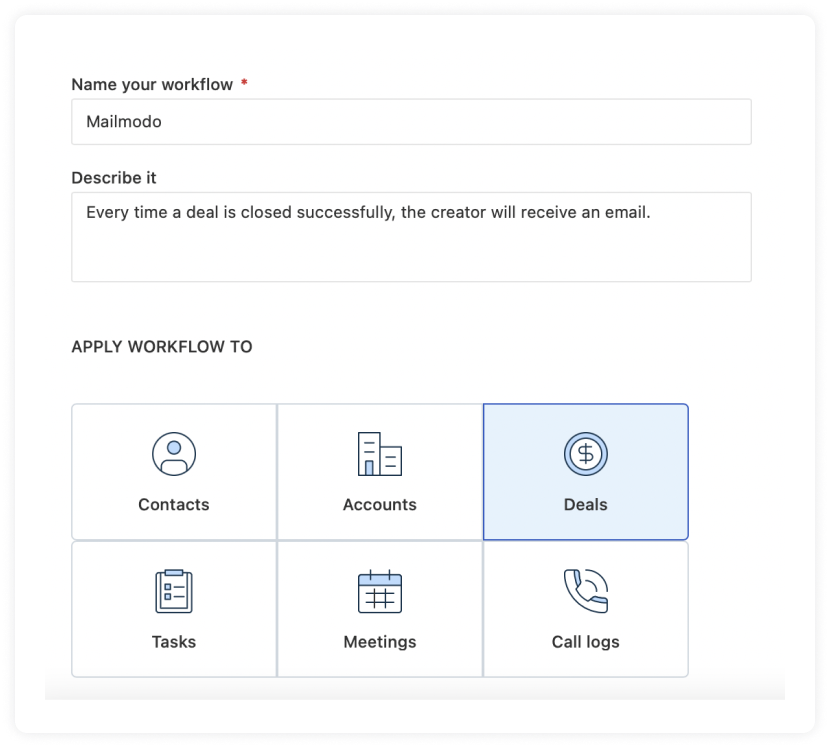
- Name your workflow, describe it. Select a record type on which you wish to apply the workflow.
- Configure your workflow's execution triggers and conditions.
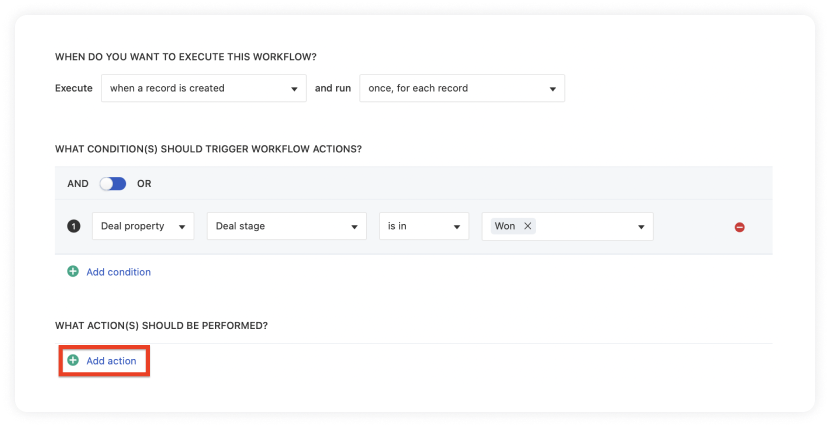
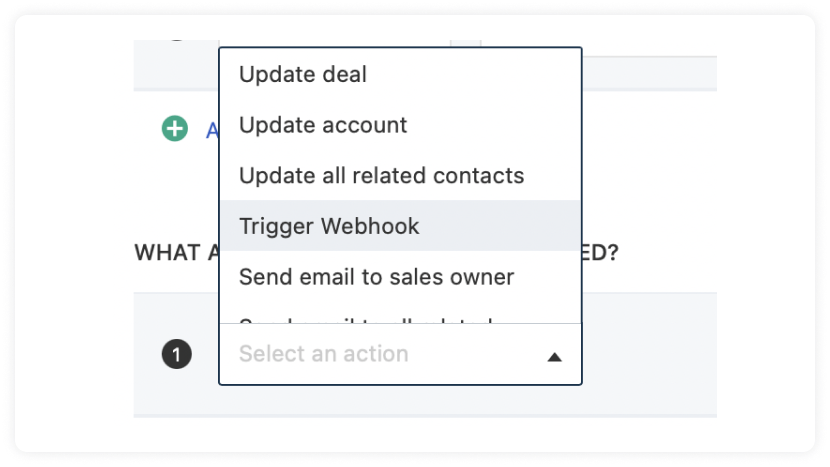
- Under what actions to be performed, click on add action. Select Trigger Webhook.
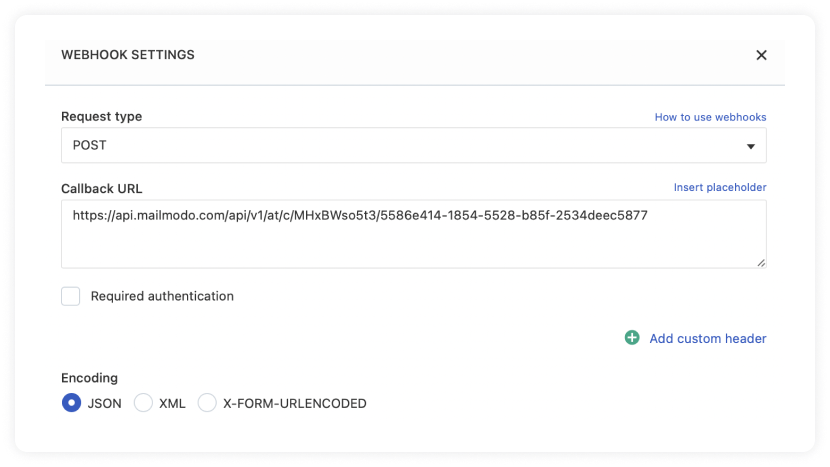
- After selecting Trigger Webhooks, webhook settings will open. Select request type as POST. Paste the URL copied from Mailmodo's Trigger Info section. Select encoding type as JSON.
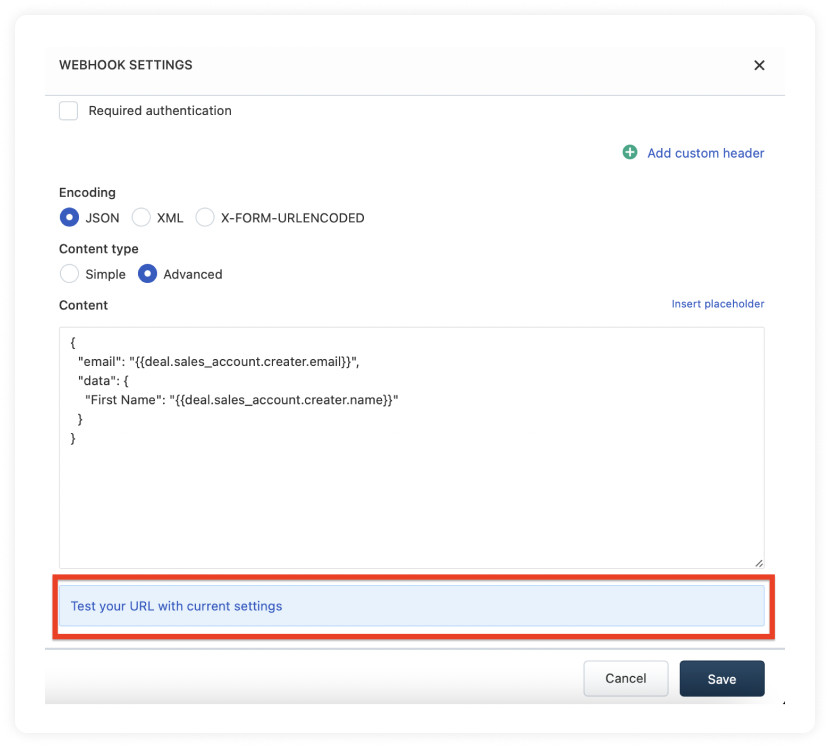
Select content type as Advanced. Paste this in the text field.
{
"email": "",
"data": {
"First Name": ""
}
}
Map the respective elements by clicking on the insert placeholder button in the corner.
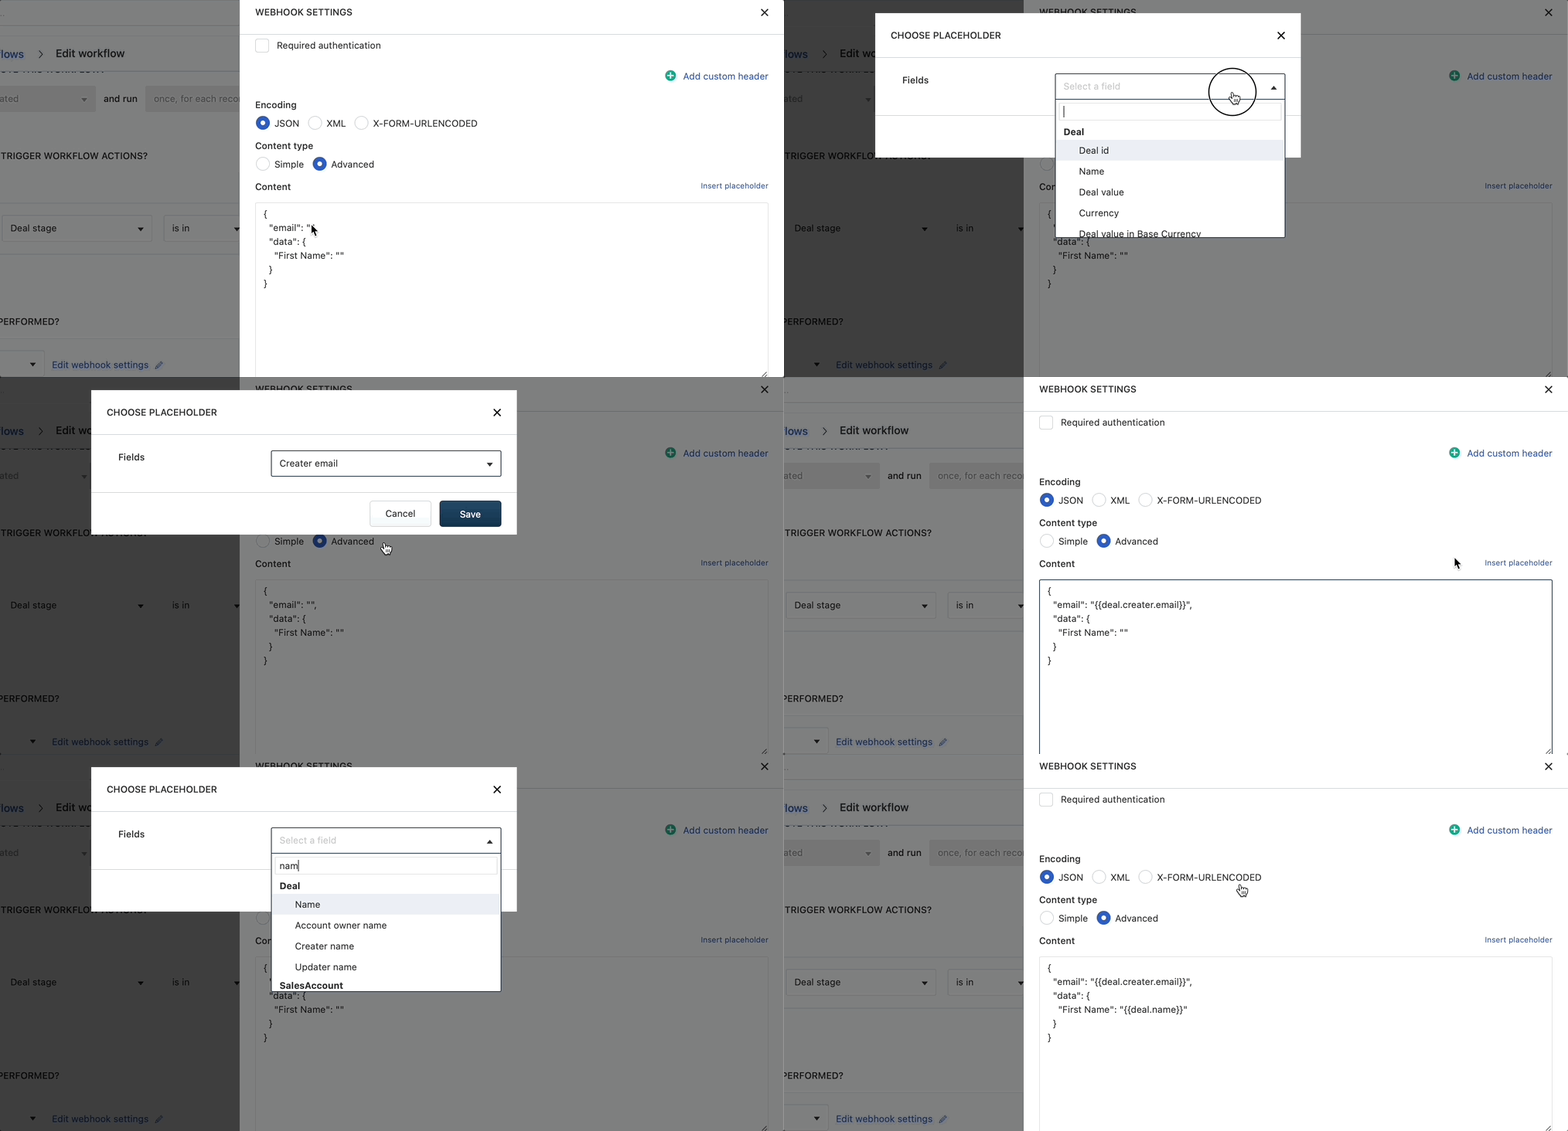
- A chosen placeholder block will open. Map the respective user property. Click on save.
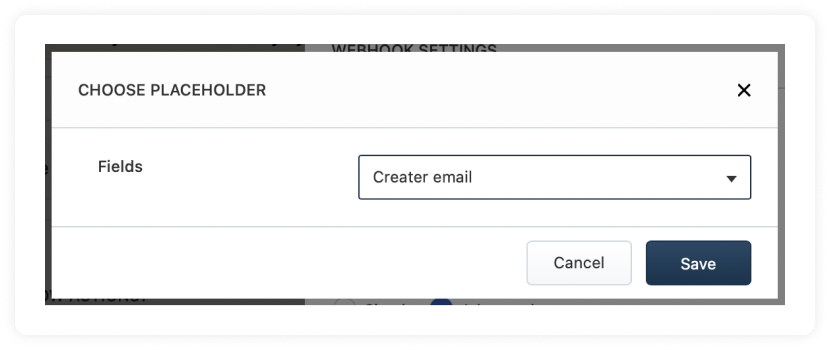
- After mapping, your screen should look similar to this. Click on Test your URL with current settings.
- Your screen should display the Received success response.
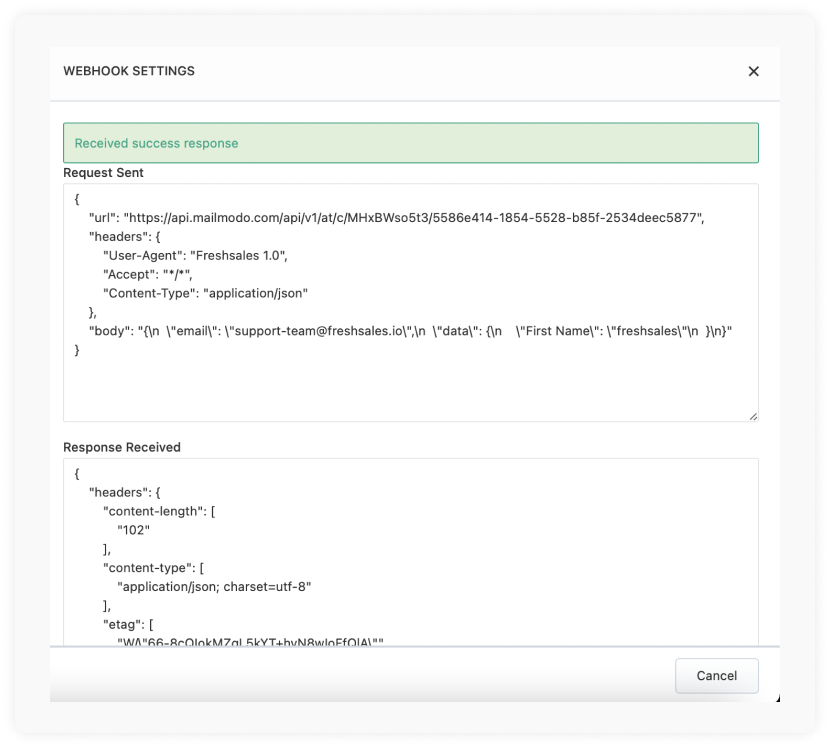
- Upon successful testing, click on the cross. Save the webhook settings. Click on Save and Start.

You have successfully created a trigger campaign!
Wrap up
You’ll only harm your productivity by switching between one ESP to other to send HTML and AMP emails. But you can save yourself significant time by switching to Mailmodo instead, as we offer both HTML and AMP email creation.
Check out our definitive guide on AMP emails if you want to have an in-depth understanding of all things AMP. One of the best ways to know if something work is by trying it out. So sign up for Mailmodo today to take full advantage of AMP emails!
What you should do next
Hey there, thanks for reading till the end. Here are 3 ways we can help you grow your business:
Talk to an email expert. Need someone to take your email marketing to the next level? Mailmodo’s experts are here for you. Schedule a 30-minute email consultation. Don’t worry, it’s on the house. Book a meet here.
Send emails that bring higher conversions. Mailmodo is an ESP that helps you to create and send app-like interactive emails with forms, carts, calendars, games, and other widgets for higher conversions. Sign up now and send 10k free emails/month. Sign up here.
Get smarter with our email resources. Explore all our knowledge base here and learn about email marketing, marketing strategies, best practices, growth hacks, case studies, templates, and more. Access guides here.

