Connecting multiple platforms and building automated workflows is easy with Zapier. And connecting Mailmodo and Zapier is even easier with Mailmodo’s Zapier integration.
This guide is your one-stop solution if you’ve set up triggered AMP emails in Mailmodo and want to tie everything up with Zapier.
Table of contents
- Benefits of Zapier integration with Mailmodo
- How to send AMP emails from Zapier using Mailmodo
- Wrap up
Benefits of Zapier integration with Mailmodo
If Razorpay increased its survey responses by 257% and Murdex raised its signup rate by 280% with Mailmodo, what’s stopping you from taking the next best step for your business? Here are some benefits of integrating your Zapier account with Mailmodo to send AMP emails:
We have kept only a few steps from our end so that you can set up your workflow within minutes.
We have designed beautiful templates for you to use and set up your triggered email campaign quickly.
We have also made it super easy to create templates from scratch. Just use our drag-and-drop editor and create templates without any code.
Setting up Mailmodo and Zapier is quicker than finishing your lunch. The steps are simple, and they can be done in just a few minutes. So let’s now look at the exact steps involved.
How to send AMP emails from Zapier using Mailmodo
This entire process requires you to get the API key from Mailmodo and set up the further things in Zapier. Let’s start with Mailmodo.
Get API key from Mailmodo
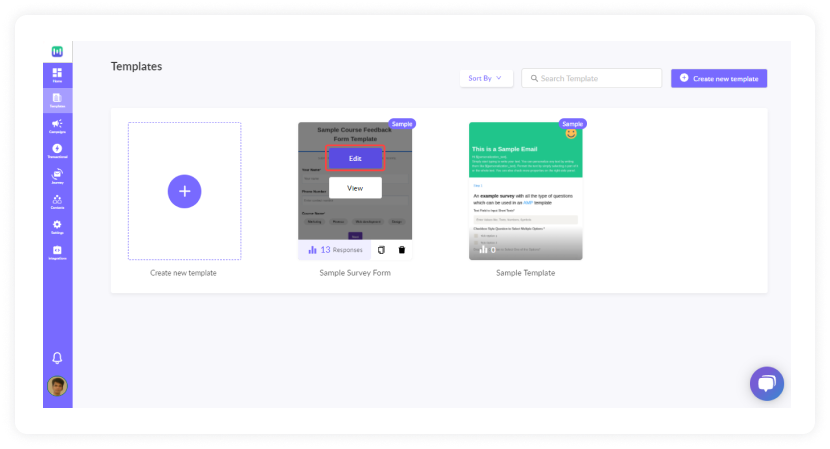
- Create a new template or hover over the existing templates and click ‘Edit.’
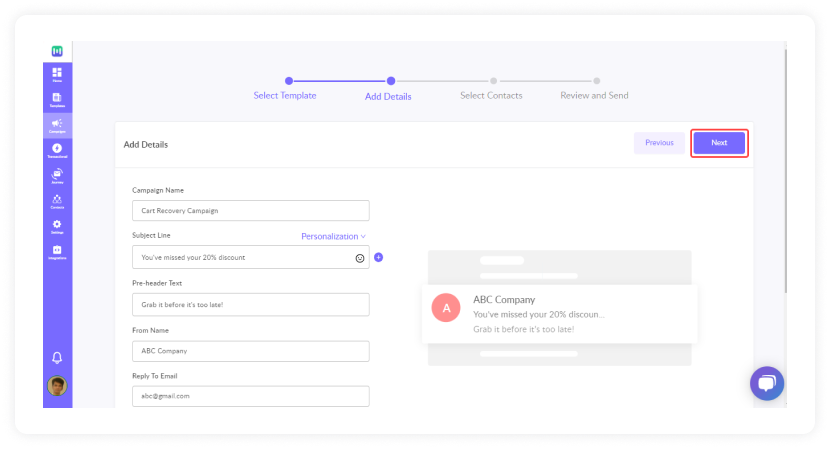
- Then, configure your AMP email and in the next step, add details of your campaign and click ‘Next.’
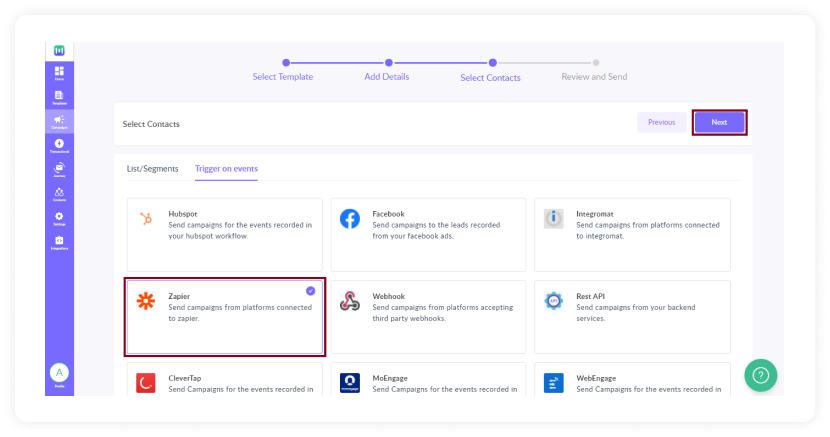
- Select 'Zapier' from the list of available apps.
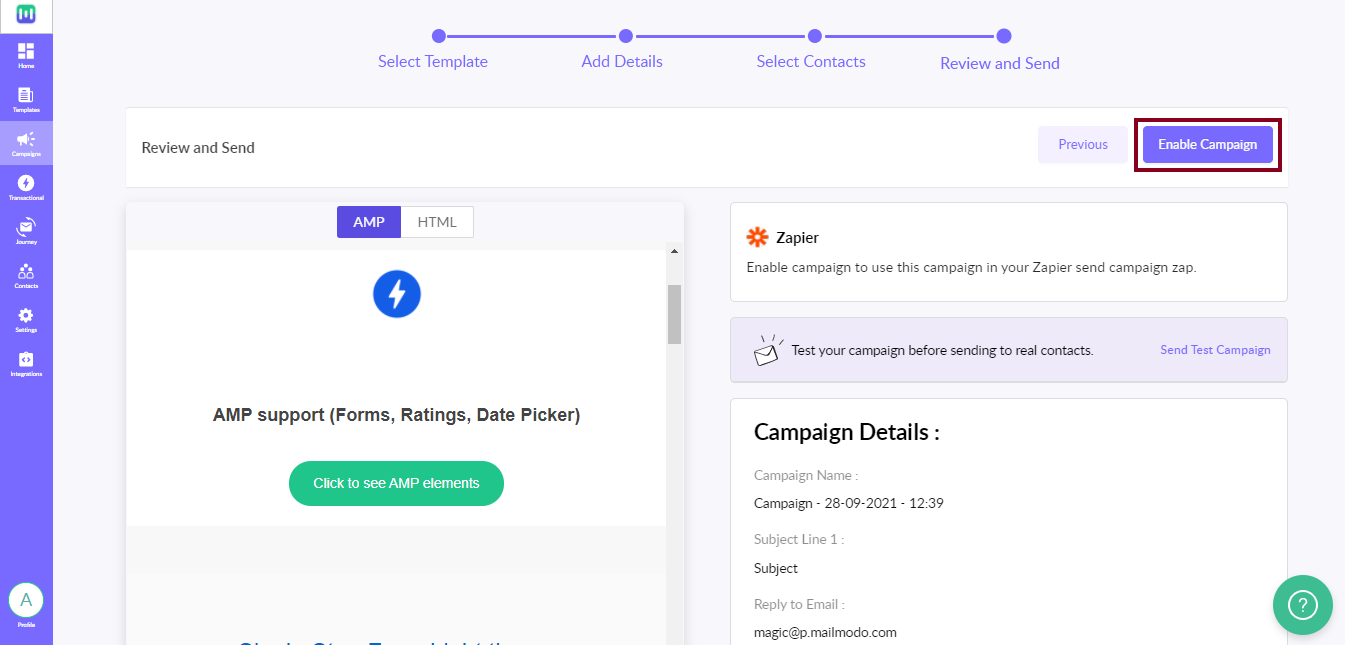
In the review section, ensure all the details are correctly shown. After reviewing, click on 'Enable Campaign' to create the transactional campaign.
Once the campaign is enabled, you will see the Trigger Info page. Click on 'Show API Key.'
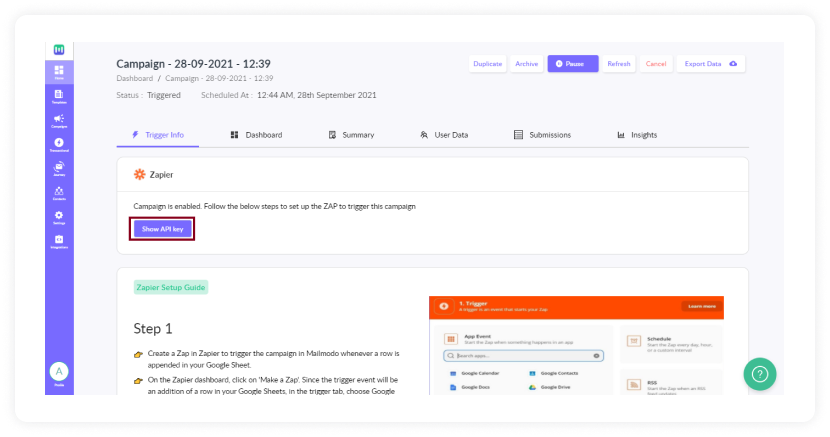
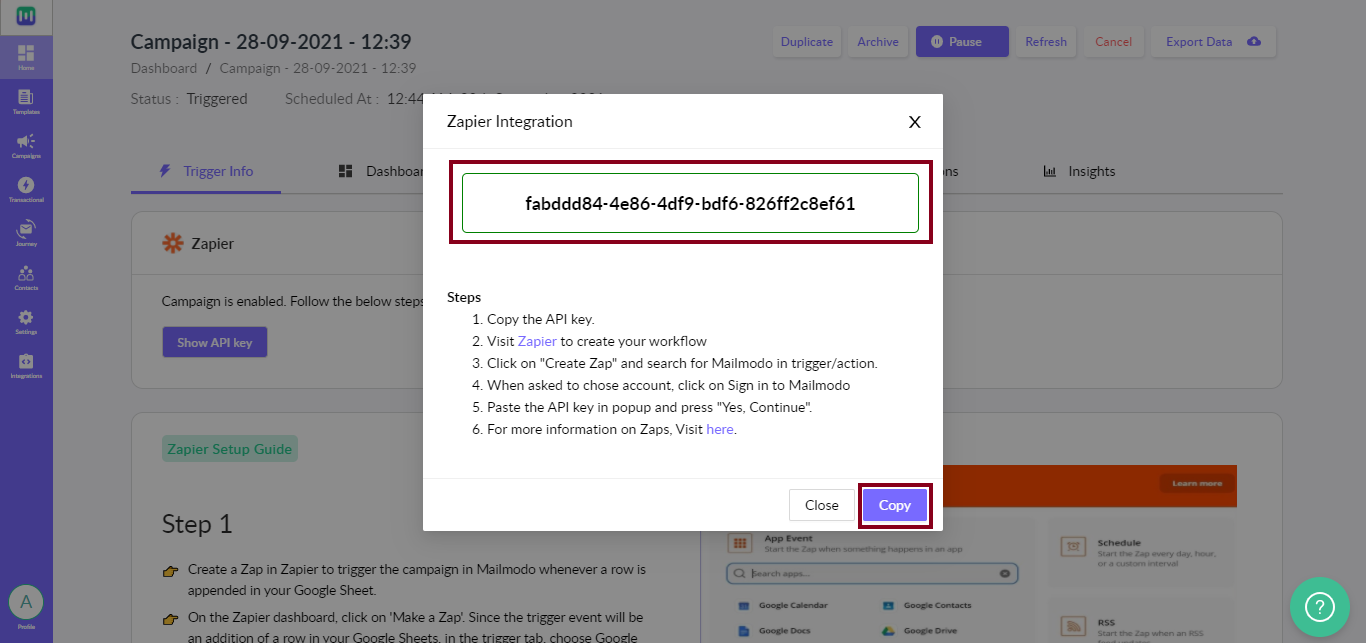
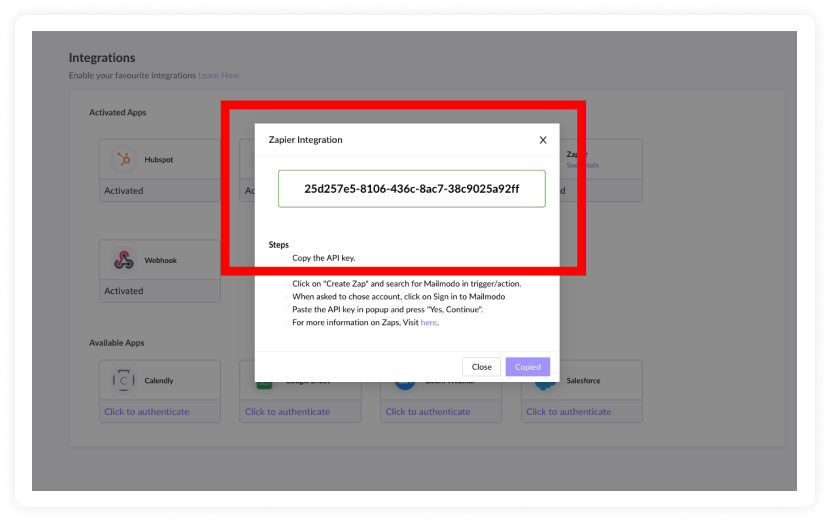
- The API Key will be displayed along with the steps to be followed. Copy the API Key.
Setup process in Zapier
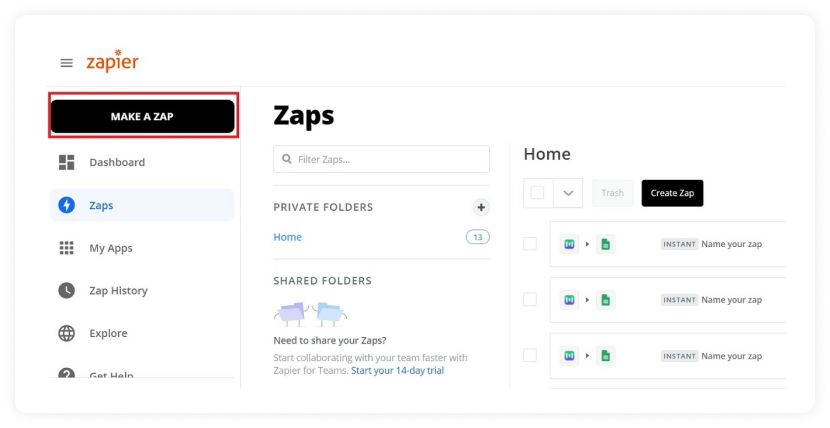
- On the Zapier dashboard, click on 'Make a Zap.'
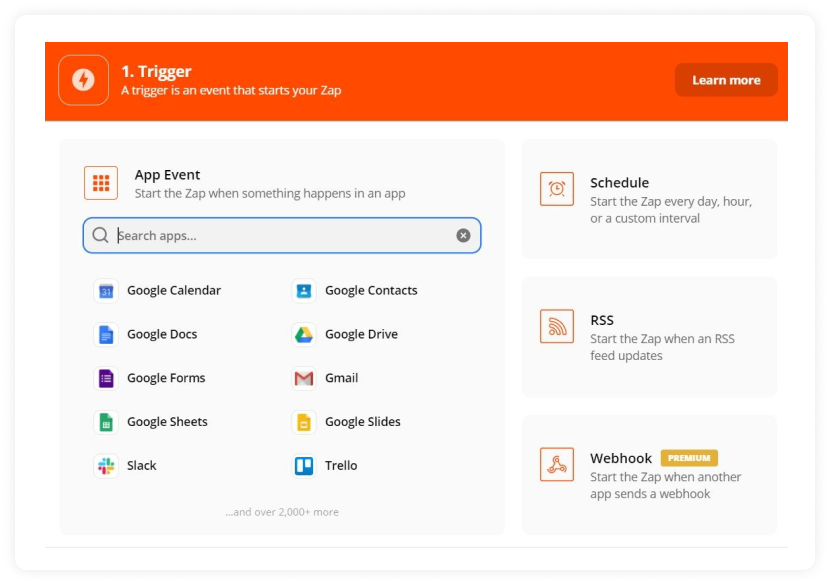
- Since the trigger event will be an addition of a row in your Google Sheets, in the trigger tab, choose Google Sheets.
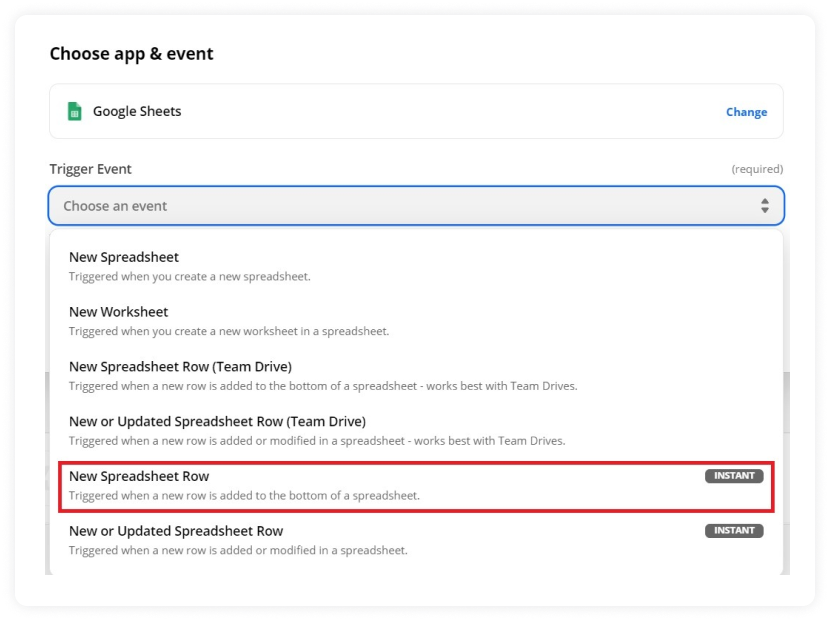
- In the Trigger Event section, choose 'New Spreadsheet Row'. Then click on 'Continue.'
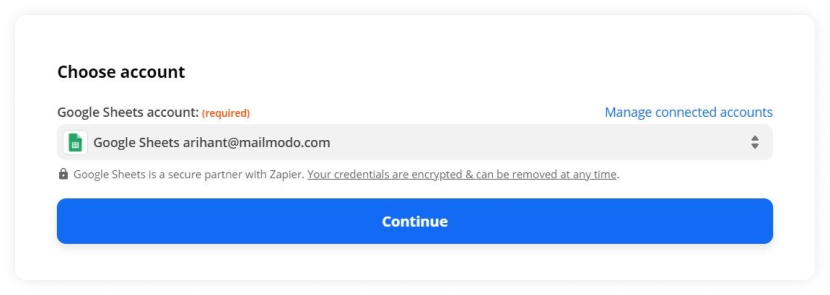
- Select the Google Sheets account you want to use.
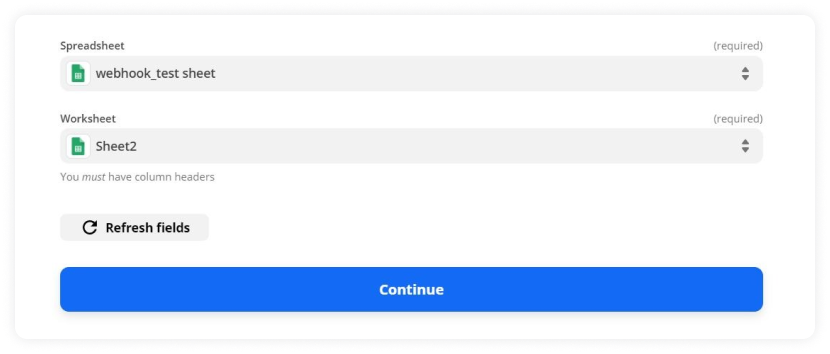
- Select the Spreadsheet and Worksheet to be used to create the trigger
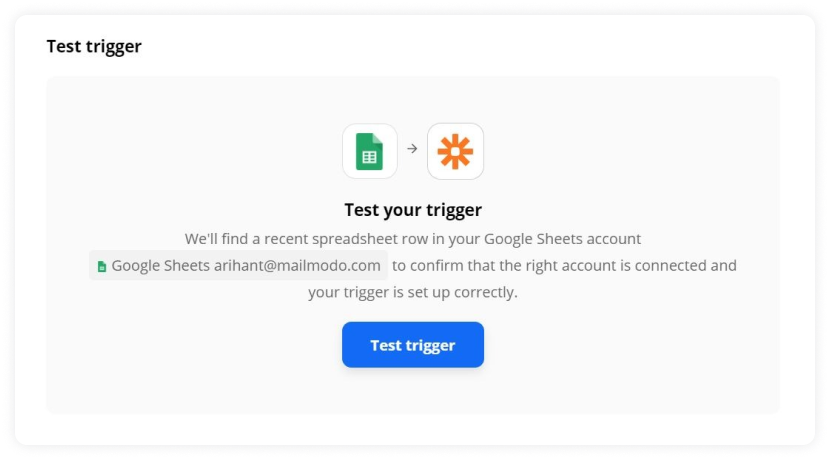
- Once the trigger setup is complete, test it by clicking on 'Test trigger.'
- The action will be performed in Mailmodo. So, in the App Event tab, search for Mailmodo to add as an app.

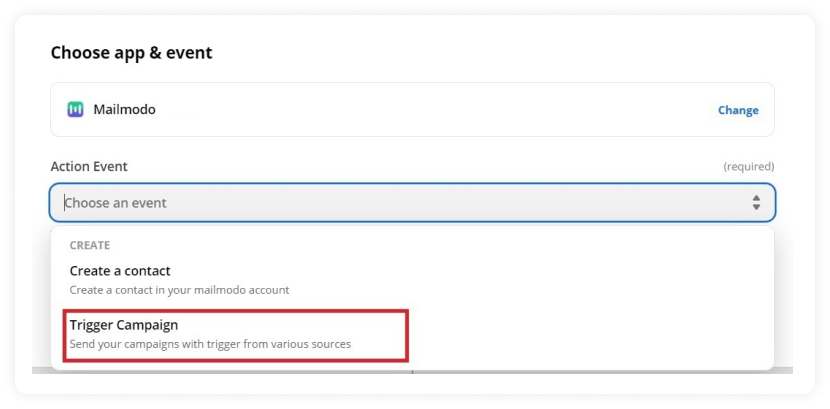
- In the Action Event tab, select 'Trigger Campaign' and click on 'Continue.'
- Next, select the Mailmodo account. You will be asked to sign-in in the next step. Here, you need to paste the API key you received in Mailmodo. You can access the API key anytime by going to the 'Integrations' tab in Mailmodo and clicking on 'See details under Zapier.
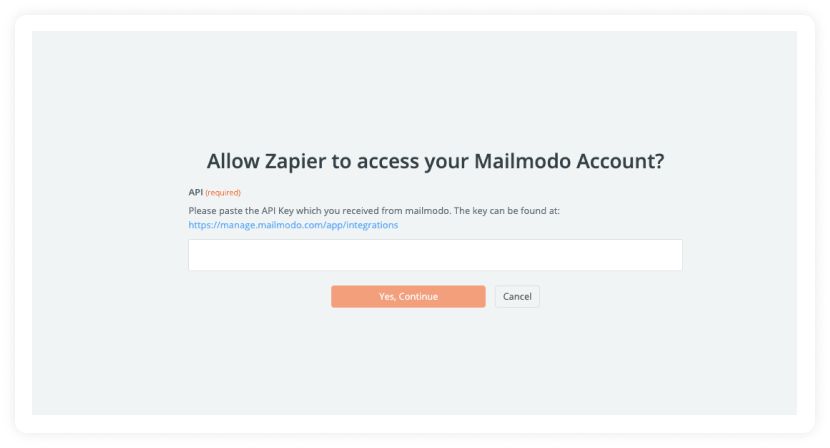
- Paste the API key in the box. Then click on 'Yes, Continue'.
- Here, you’ve to set up the Action Event. Here are the details:
Campaign Name: Select the transactional campaign to be triggered. Email: Enter the Email ID to which the mail is triggered, or map it to the column header containing the mail IDs (to which the mails are to be triggered) in the connected Google Sheet. Subject: Enter the subject line, or map it to 1 of the column headers in the connected Google Sheet. Append to Mailmodo's list: Select the contacts list in Mailmodo to which the mail IDs will be appended.
Once Action Event is set up, test your trigger by clicking on 'Test & Continue.'
If the events have been correctly set up, the following screen will appear. Click on 'Turn on Zap,' and the Zap will be successfully configured.
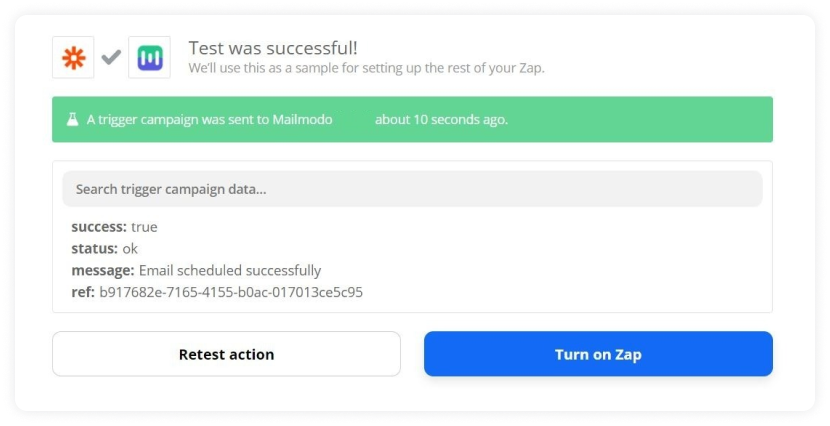
Henceforth, any row appended in the selected Google Sheet will trigger an email in Mailmodo.
Wrap up
Mailmodo is an A - Z email marketing solution that you can rely on and increase your conversion rates significantly just like our users. Mailmodo is also a pioneer in AMP emails and we are continuously pushing the boundary by creating interesting features like spin the wheel.
Check out our definitive guide on AMP emails if you want to have an in-depth understanding of all things AMP. One of the best ways to know if something works is by trying it out. So sign up for Mailmodo today to take full advantage of AMP emails!
What you should do next
Hey there, thanks for reading till the end. Here are 3 ways we can help you grow your business:
Talk to an email expert. Need someone to take your email marketing to the next level? Mailmodo’s experts are here for you. Schedule a 30-minute email consultation. Don’t worry, it’s on the house. Book a meet here.
Send emails that bring higher conversions. Mailmodo is an ESP that helps you to create and send app-like interactive emails with forms, carts, calendars, games, and other widgets for higher conversions. Sign up now and send 10k free emails/month. Sign up here.
Get smarter with our email resources. Explore all our knowledge base here and learn about email marketing, marketing strategies, best practices, growth hacks, case studies, templates, and more. Access guides here.

